How to Decoupage a Jar
Decoupage candle containers to give them an interesting and fun appearance. As the candle melts down, the flame will glow through the paper or fabric adding even more character. Completely cover the container or add a small or decorative picture. Start by gathering all the items that you will need. The process will go much more smoothly if everything is readily accessible.
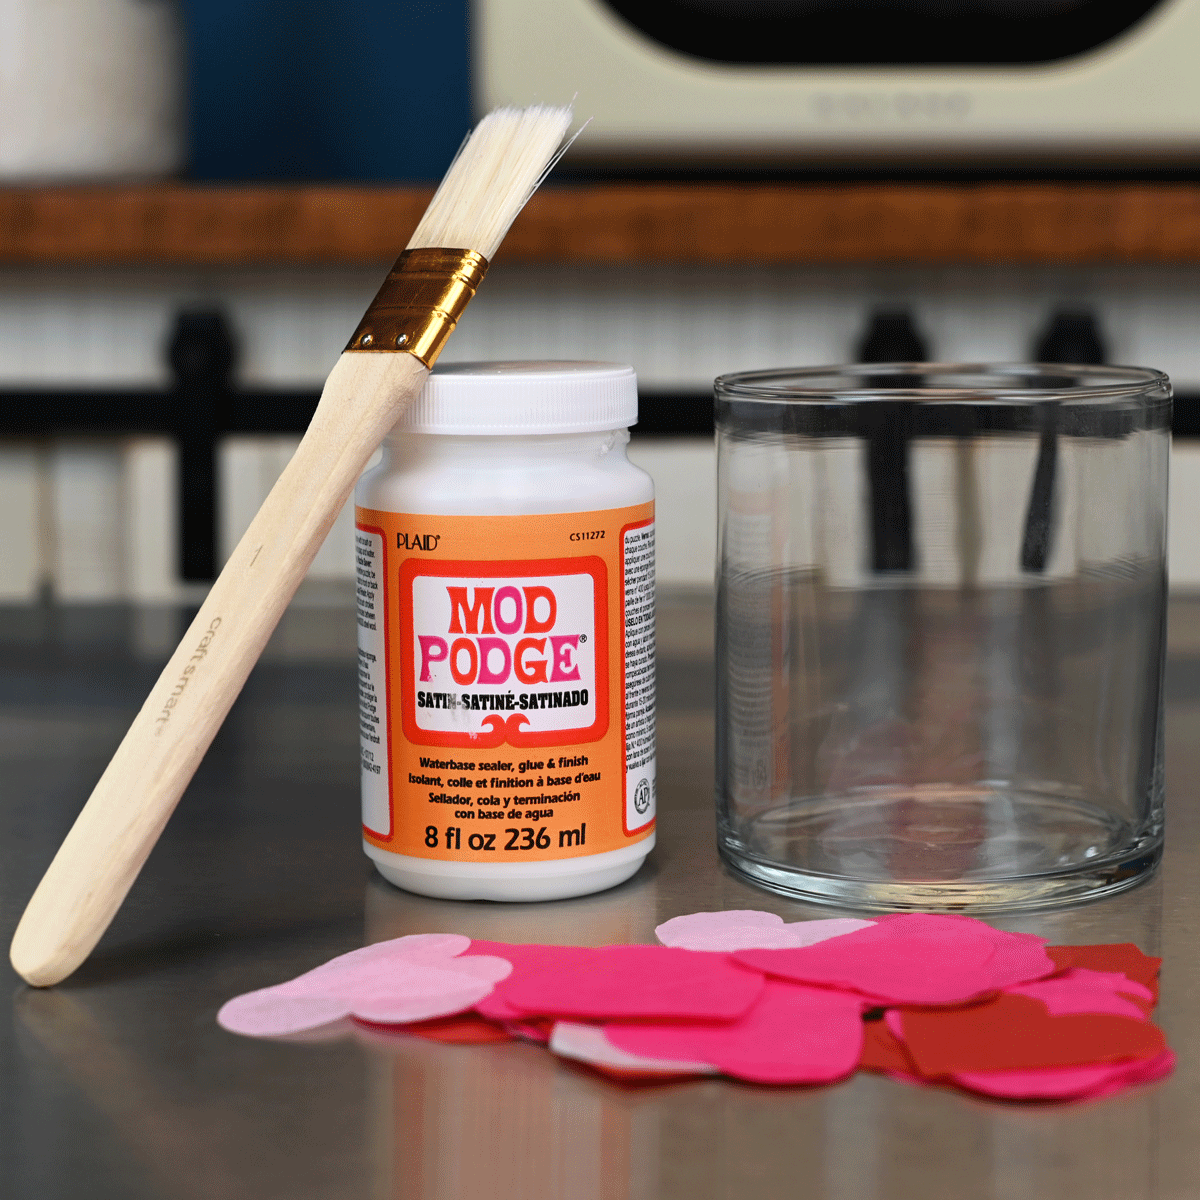
Here's What You'll Need:
Mod Podge™ or Similar Product
Your Choice of Candle Jar We used the Libbey 22oz Cylinder
Tissue Paper or Fabric
Hole Punch
Paint Brush or Sponge Applicator
Wax Paper
Cover your work area with butcher paper or newspaper. Spills or drips are most times unavoidable, and clean-up is much easier if you don’t have to clean wax off of your work surface.
Step 1
Gather all of your supplies so everything is easily accessible.
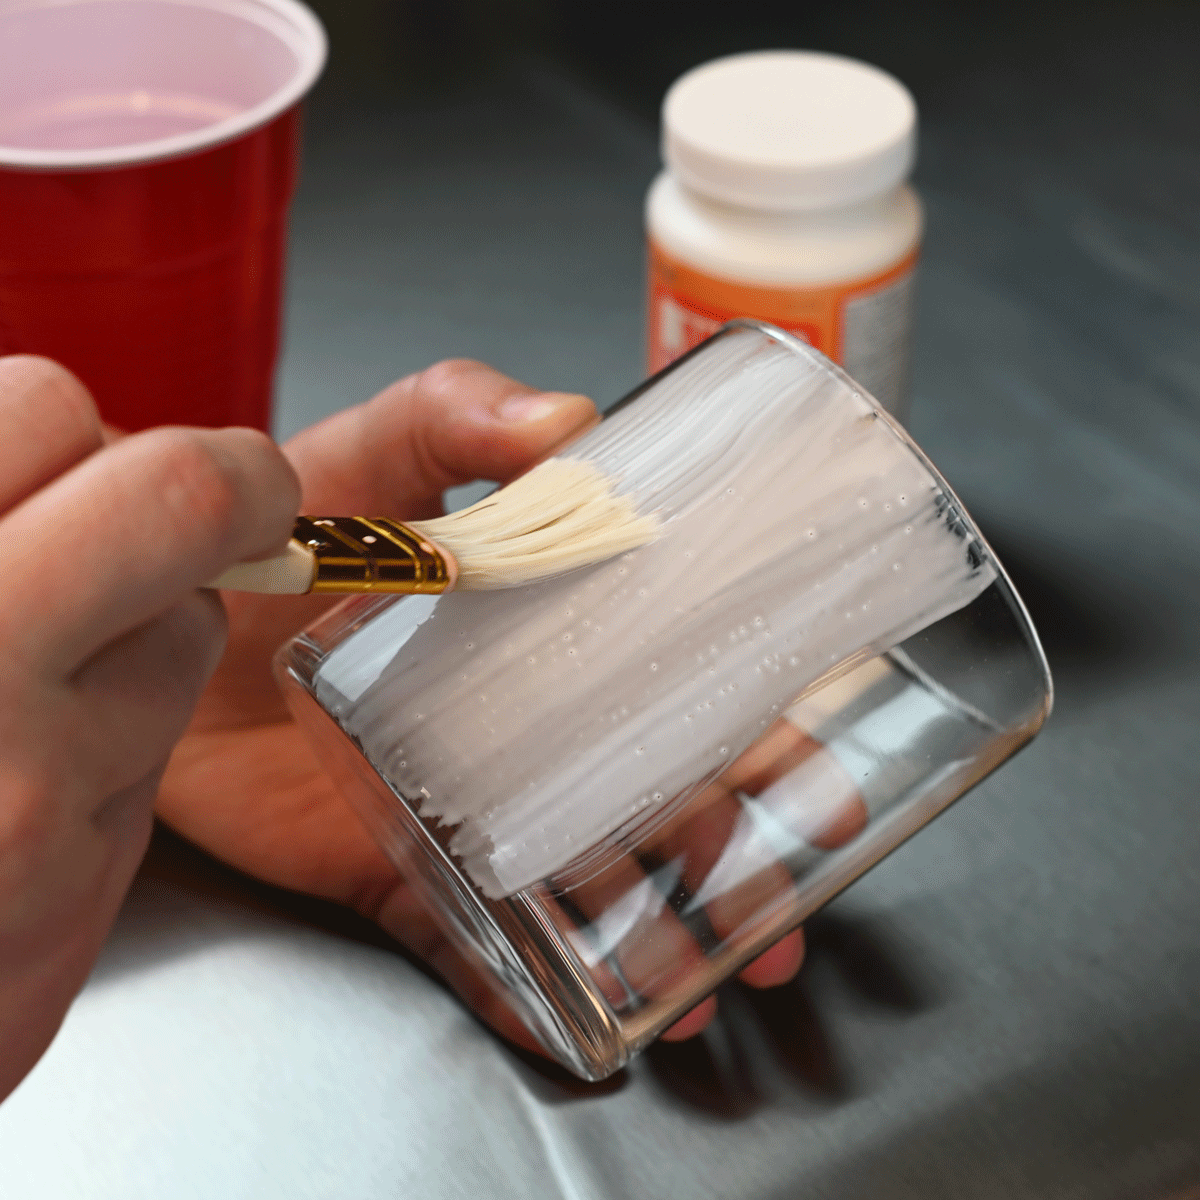
Step 2
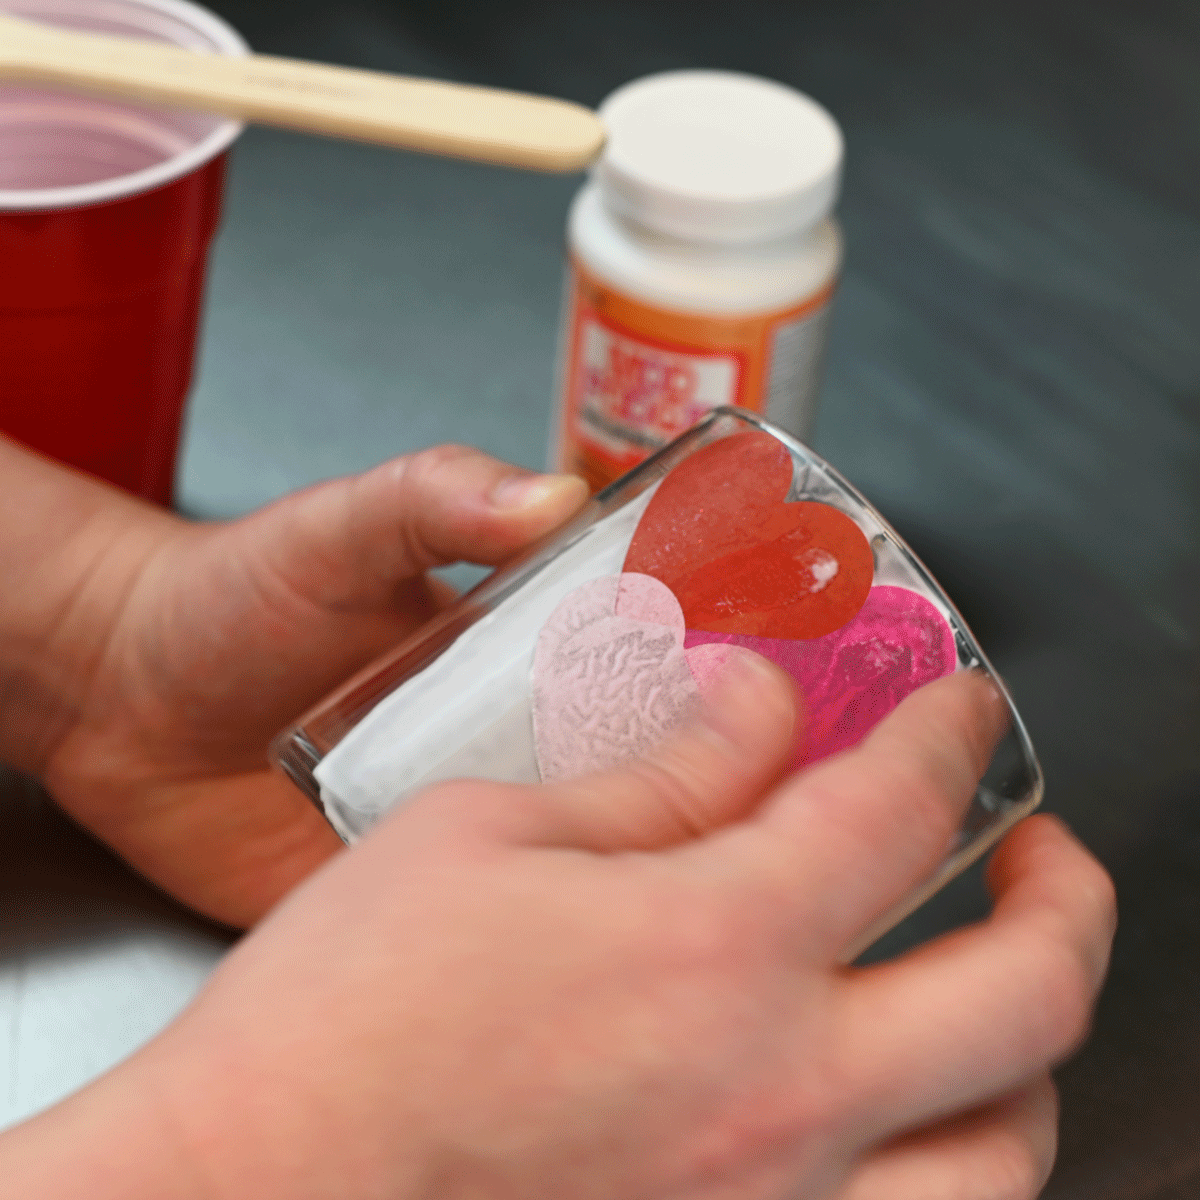
Start by applying the glue/sealer product to a small area of the glass.
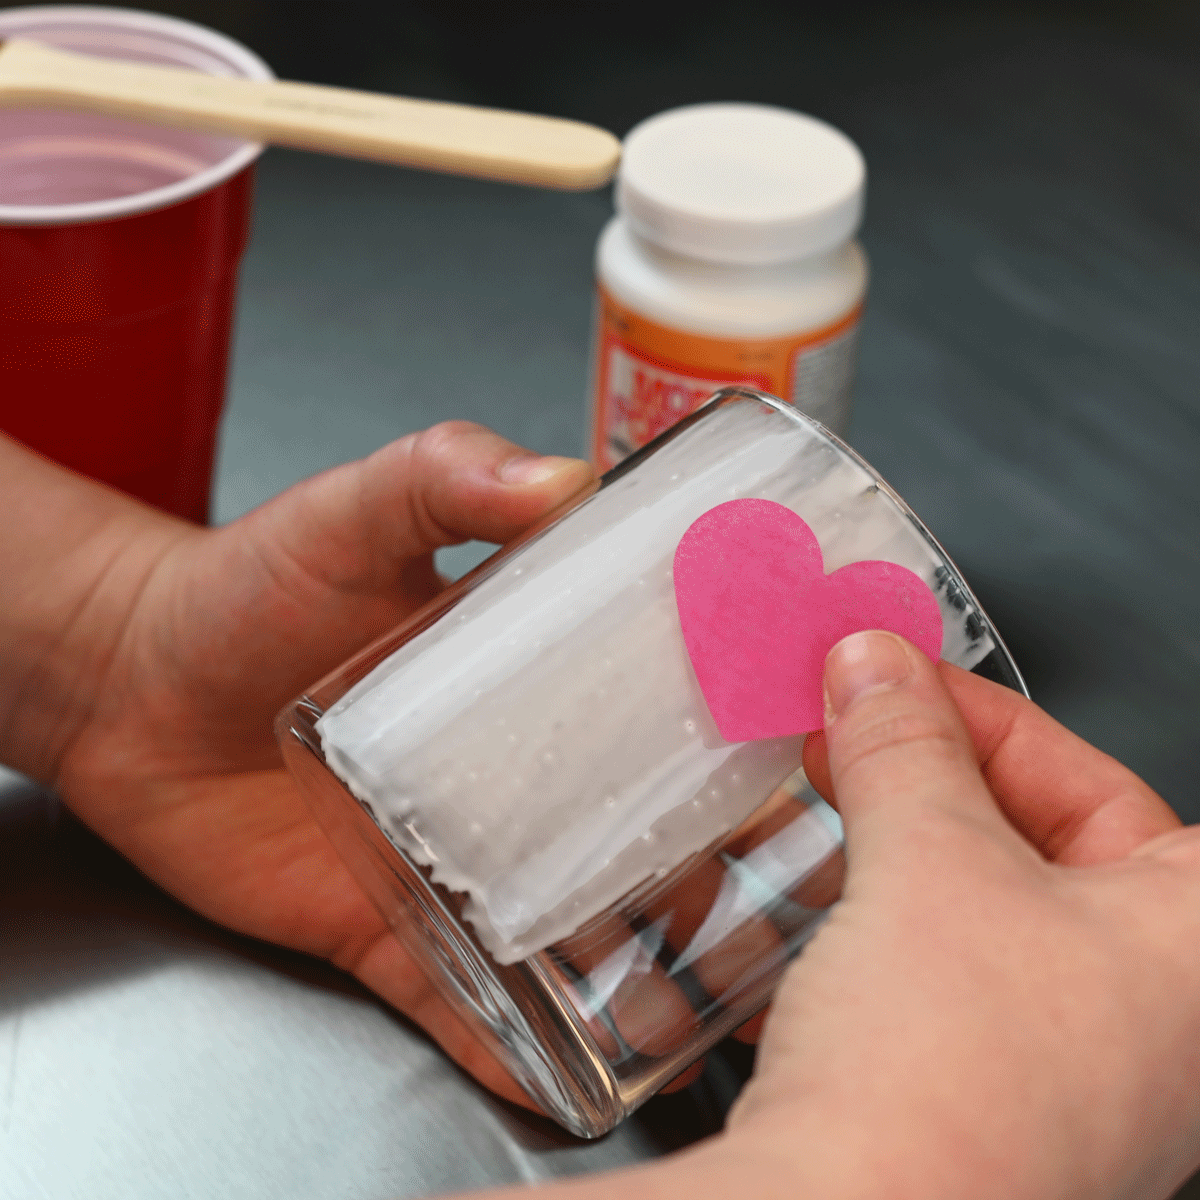
Step 3
Carefully lay the tissue paper piece in the glue.
Step 4
Gently smooth the tissue paper with your finger. You can lightly tap the paper into place to make sure it does not tear. Use your finger or the sponge applicator to help gently smooth away any wrinkles that may form.
Step 5
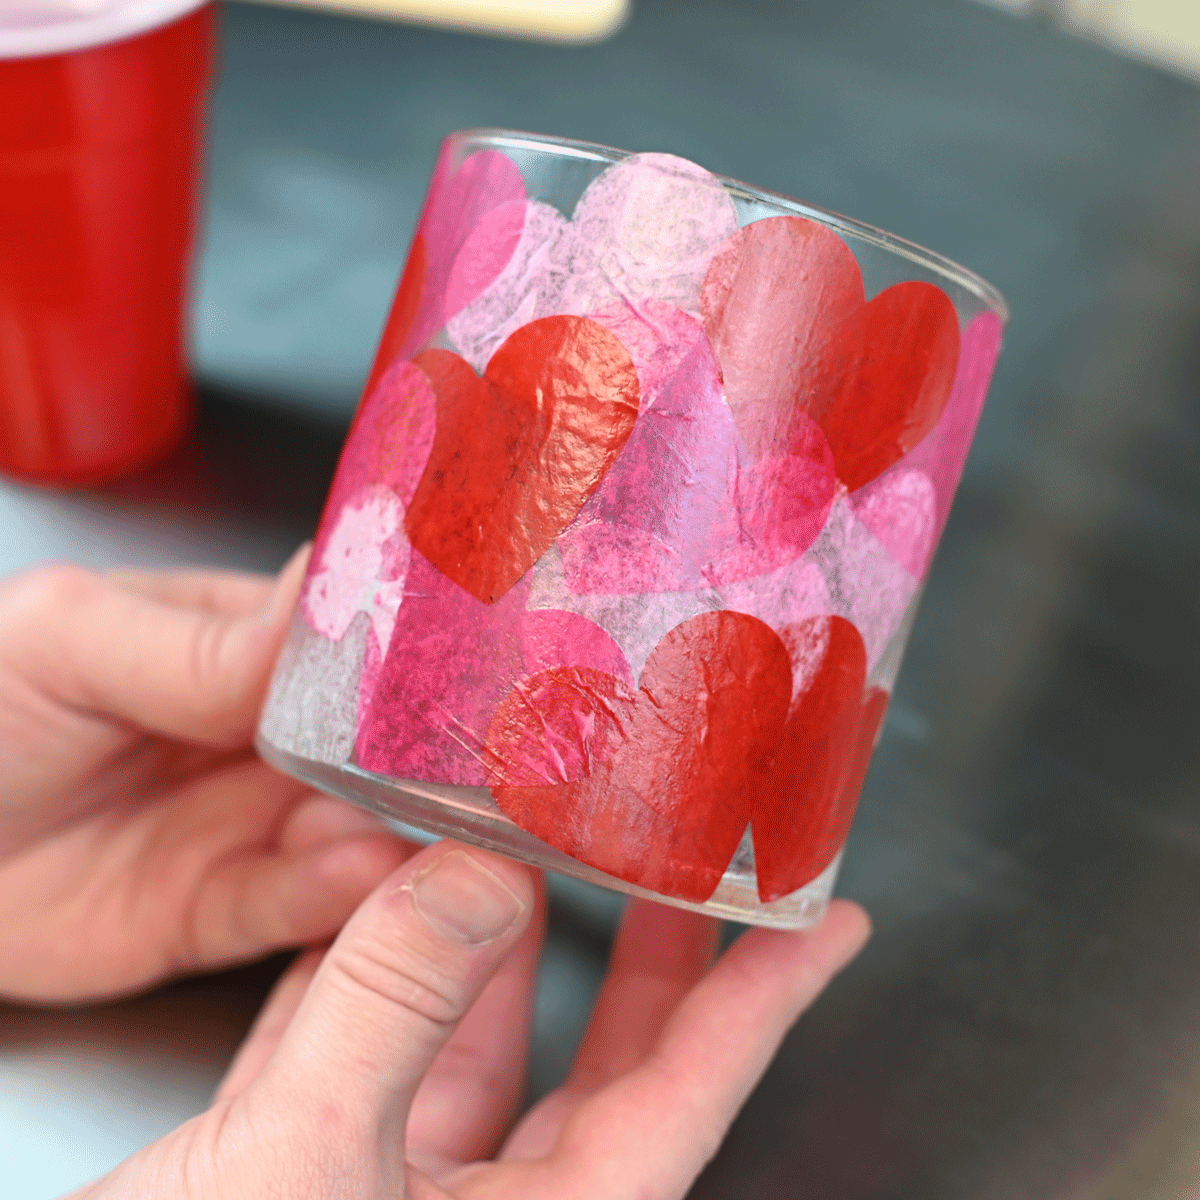
Add more glue and tissue in small sections until the container is covered to your satisfaction.
Step 6
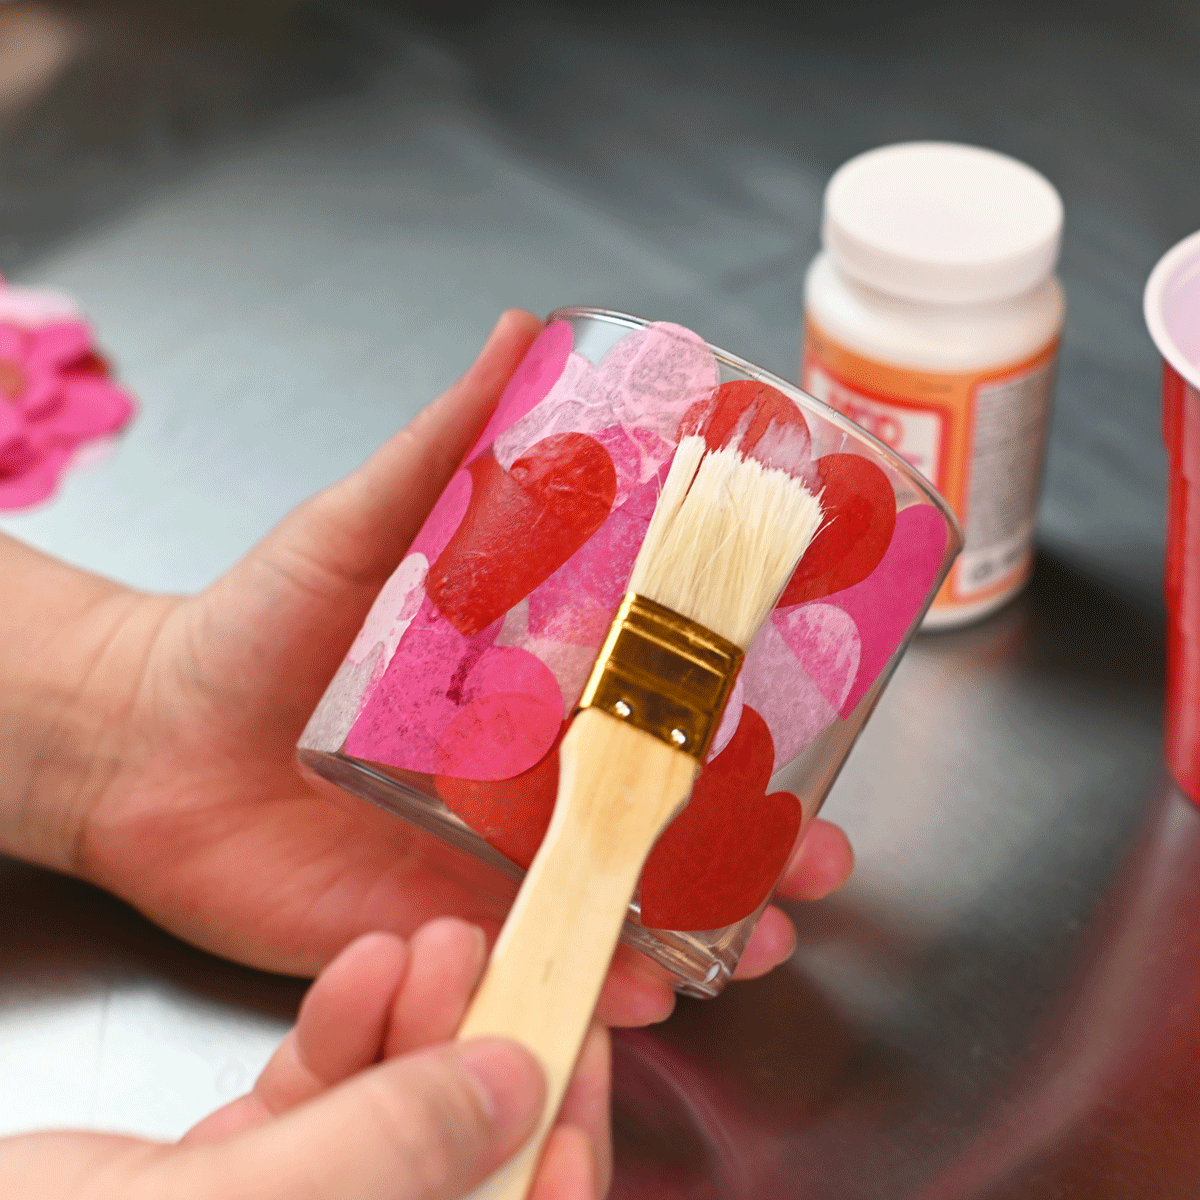
Follow the directions on the glue product you are using to apply a protective coating. You may need to allow the container to dry for 15 - 20 minutes before adding this final coat. Make sure to cover the entire container, and be careful not to wrinkle or bend any of the tissue you have already added. Be sure to allow it to dry completely before handling or packaging.

That's it!
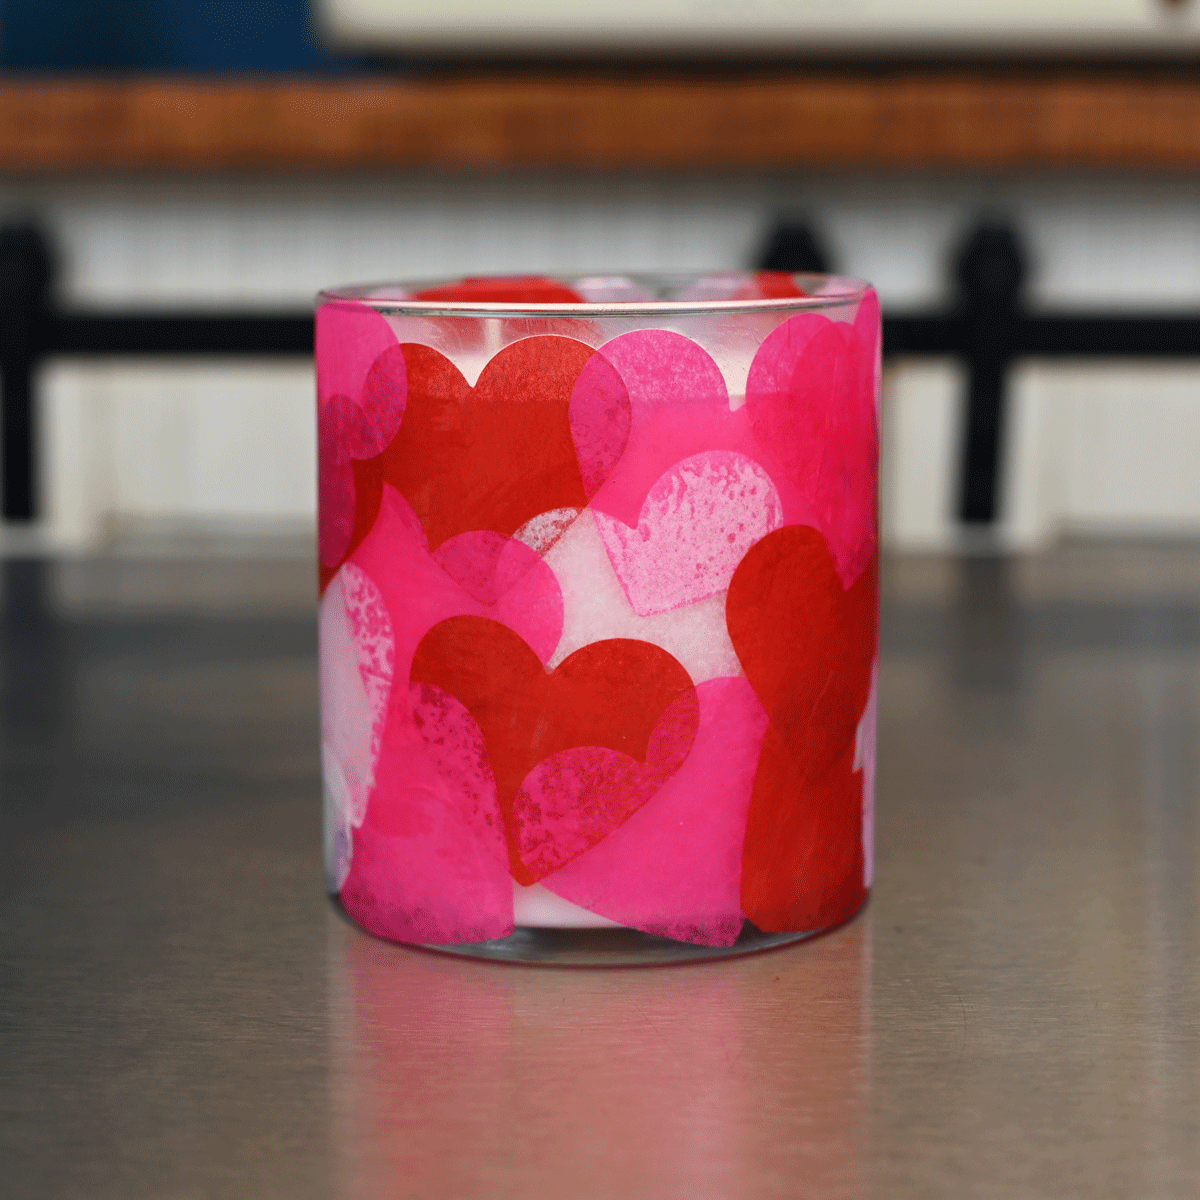
You're finished! Enjoy your festive creation
NOTE: Make sure to keep any flammable materials, like tissue paper or fabric, on the outside of the container. Having these items too close to the wick can be a fire hazard.
Are you ready to give it a try? Get everything you need from us to start making candles by browsing our selection of candle making supplies or by simply clicking on the items in the Materials List at the top of this page to take you directly to that item on our website.
Tag us if you share your creations on your social media accounts! You can use the hashtag #lonestarcommunity and see your beautiful creations on our Lone Star Community Page.