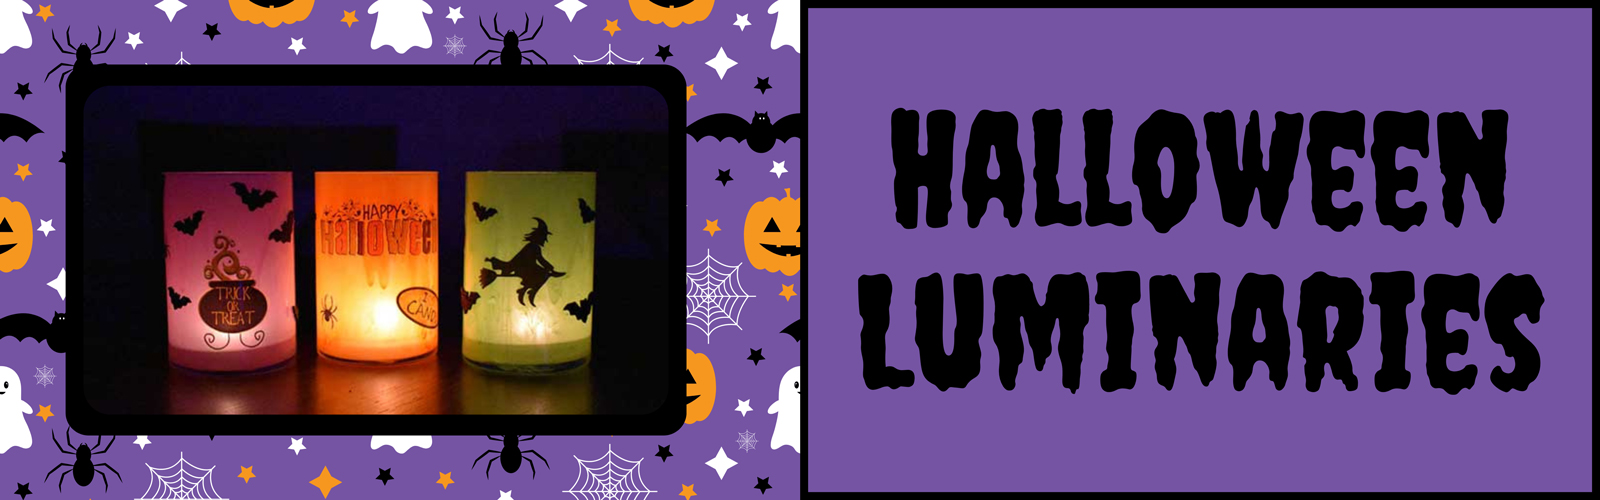
How to Make Halloween Luminaries
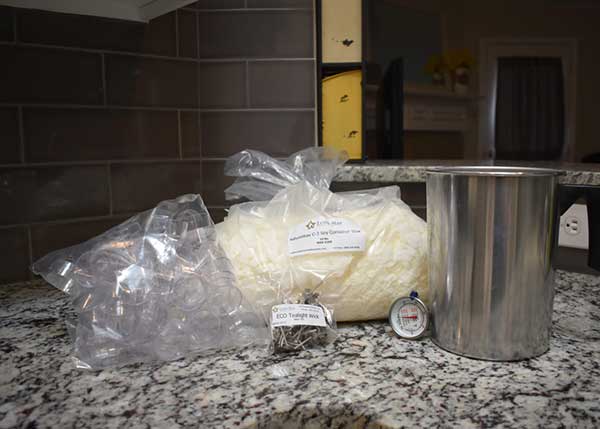
Here's What You'll Need to Make the Tealights:
Tealight Cups (plastic or aluminum)
Soy or Paraffin Container Wax
Tealight Wicks (ECO for Soy, Standard for Paraffin)
Thermometer
Pouring Pot
Medium Sauce Pan
Cookie Cutter or Metal Trivet
Metal Spoon or Stir Stick
Parchment Paper
Step 1
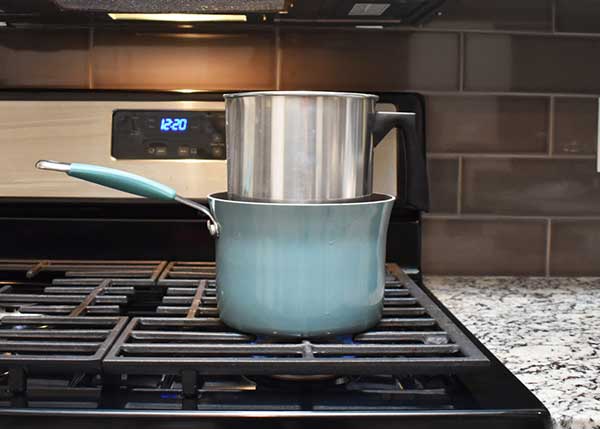
First, we measured out and melted the wax for the tealight candles. These little tealight cups hold about 1/3 of an ounce of wax each so you will need to measure out the proper amount for the number of tealight cups you are pouring. For this project, we poured about 20 tealight cups so we measured out approximately 7oz of wax (.33 x 20=6.6). We decided not to add any fragrance oil or dye to the tealights but if you would like them to smell good you can certainly add any fragrance of your choice! If you need some instruction on melting your wax click here.

Step 2
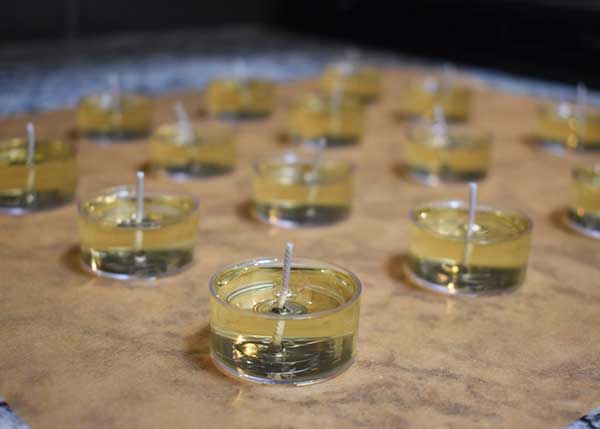
You may not be able to tell from the pictures but, these tealight cups are TINY! Sometimes pouring wax into a container this small can be a little bit difficult which means spills are almost unavoidable. We laid down a sheet of parchment paper to make cleanup super easy. Doing this extra step will not only make clean-up super easy but, it will help protect your countertops from any potential damage or staining (if you are using dye or fragrance oil).
After we laid down the parchment paper (wax paper will work too by the way), we spaced out the tealight cups to give us plenty of room to pour each of them easily and effectively.
After we laid down the parchment paper (wax paper will work too by the way), we spaced out the tealight cups to give us plenty of room to pour each of them easily and effectively.

Step 3
After we spaced out all of the tealight cups, we gently placed a little tealight wick in the center of each cup. Since these tealight cups are so small and shallow, we chose not to use any sort of adhesive to stick the wick tab to the bottom of the tealight cup because it tends to raise up the wick and steals some of your wax "real estate." If you're careful, you can center the tealight wicks, pour the wax in gently, and adjust any wicks that may be askew.
Step 4
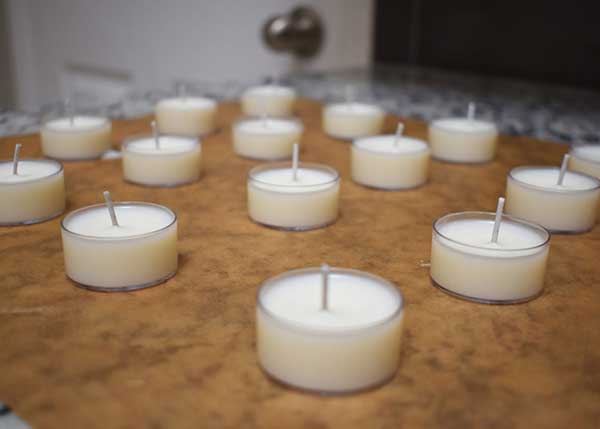
As we've already mentioned, pouring hot wax into these little tealight cups takes a steady hand and PATIENCE! You want to pour the wax slow enough so that you don't overflow the cup and avoid sloshing your wick around. It took about 3-5 minutes for us to fill up all of the tealight cups but, as you can see from the picture, we hardly spilled a drop!
Step 5
For the next step, all you need to do is let the wax cool completely. Luckily, these little guys are so small that they set up in no time at all! After we finished making the tealights, we moved on to the fun part!
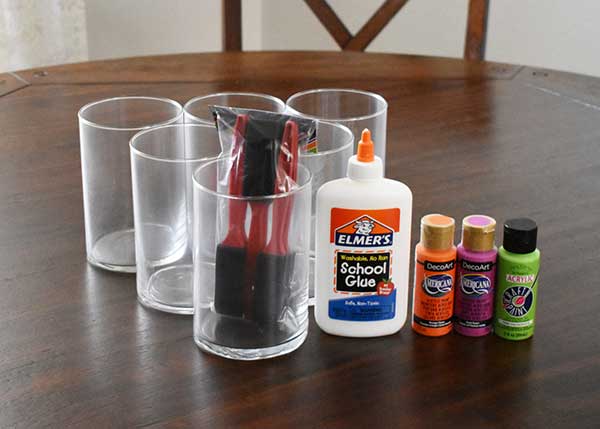
Here's What You'll Need for the Luminaries:
Libbey Cylinder Jars
School Glue
Acrylic Paint (We chose orange, fuschia, and lime green for Halloween)
A Sponge Paint Brush
Parchment Paper
Paper Plates
Halloween Stickers
Step 1
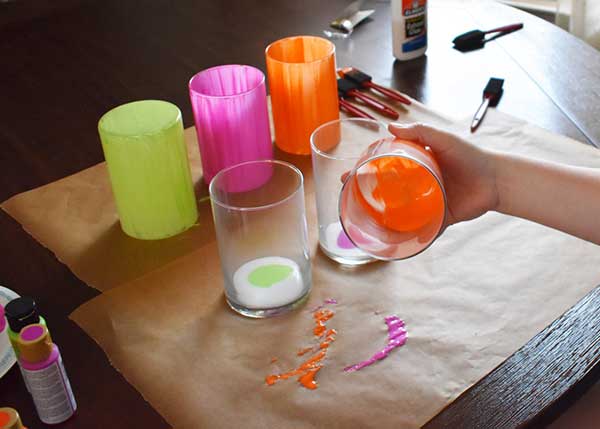
For our first attempt at painting or "staining" these containers, we used a sponge brush and painted the outside of the jar. We completed all three colors and when we looked at them, we weren't loving them. We decided to take a different approach and try again using a different method that was SUPER easy and they turned out so much better!
So this time, we decided to mix 3 parts glue with 1 part paint along with about 1 teaspoon of water. We mixed all of this in the bottom of the jar with the sponge brush until everything was fully incorporated. The paint/glue mixture was able to maintain its "thicker" viscosity but runny enough to swirl around the jar. We simply tilted and turned the jars until they were completely coated in the mixture then flipped them upside down to let the remainder of the paint run down the side.
Step 2
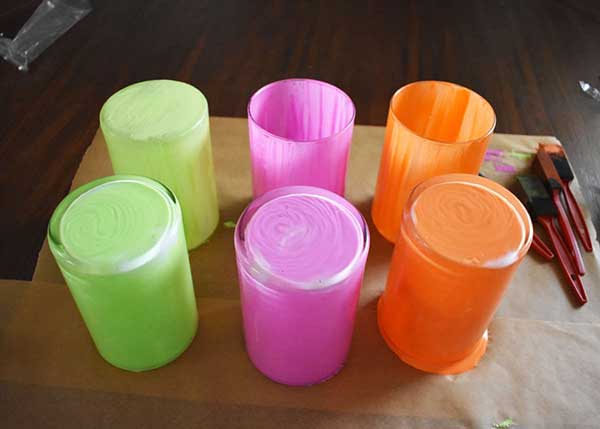
This next part is pretty easy! Once you have coated the inside of each jar with the paint/glue mixture, we recommend resting the jars upside down on a paper plate for easy clean-up but also because the paper plates will have a lip to catch any excess paint that may seep out from under the container. You definitely don't want paint all over your counter or table.
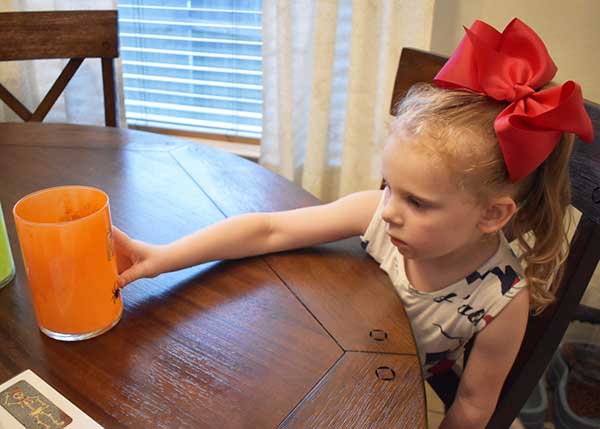
(You can see in the picture that the orange paint is starting to seep out of the bottom of the container. We transferred the jars to paper plates after this photo was taken.)
Step 3
This next step is so easy that a 5-year-old was able to help! (That, and she absolutely INSISTED we let her place the stickers on the jar.) We simply peeled the Halloween stickers and placed them wherever we wanted them. We used a combination of silhouette stickers as well as some cute little cartoons and lettering that made our jars look so cute!

That's It!
You're finished! All we did next was place one of the little tealights in the bottom of the containers, light them, and turn off all the lights. The results were absolutely perfect!
Tag us if you share your creations on your social media accounts! You can use the hashtag #lscscommunity and see your beautiful creations on our Lone Star Community Page.