How to Make Melt & Pour Christmas Ornaments
This is a great project to do with kids! You can decorate your own tree with these little ornaments or give them away as gifts.

Here's What You'll Need:
Standard White M&P Soap Base
Standard Transparent M&P Soap Base
Soap Safe Fragrance Oil
Green or Red Soap Colorant
Flat Silicone Mold
Ribbon, String, or Yarn
Microwave Safe Containers (For Melting & Pouring)
Soap Cutter or Knife
Cutting Board
A Spoon or Something to Stir With
Rubbing Alcohol in a Spray Bottle

Step 1
Chop the clear melt and pour soap base into 1-inch cubes and place in a microwave-safe container.

Step 2
Microwave on high for 2 minutes then in 30-second bursts until the soap is fully melted.

Step 3
When the soap base is melted, add a few drops of green soap colorant to the clear soap and mix thoroughly. Add more until you reach your desired color.

Step 4
Spray a flat silicone mold with rubbing alcohol. Pour a thin layer (around 0.25 - 0.50 inches deep) of the green soap into the mold and spray again. Leave soap to sit for about 30 minutes.

Step 5
After a half an hour, gently unmold the colored soap and place on a flat surface.

Step 6
Starting at one edge, start to roll up the soap into a long tube shape.

Step 7
Once the soap is rolled up, cut it with a knife into 0.5 inch thick slices and set aside.

Step 8
Chop your white soap base into 1-inch cubes and place into a microwave-safe container.

Step 9
Microwave on high for two minutes and then in 30 second bursts until the soap is fully melted.

Step 10
Add up to 3% of your soap safe fragrance oil and stir.

Step 11
Spray the flat silicone mold with alcohol again, and pour a 0.5 inch deep layer of white soap base and spray the surface. Gently place the colored swirls on top all over the soap. Spray and allow to set for at least an hour.
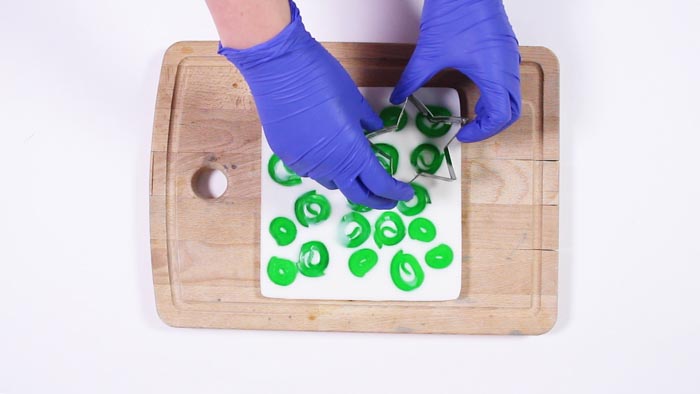
Step 12
When set, use your chosen cookie cutter shape to cut out the soap.

Step 13
Use an empty pen barrel or straw to cut holes out of the shapes. Thread the hole with a ribbon or string.
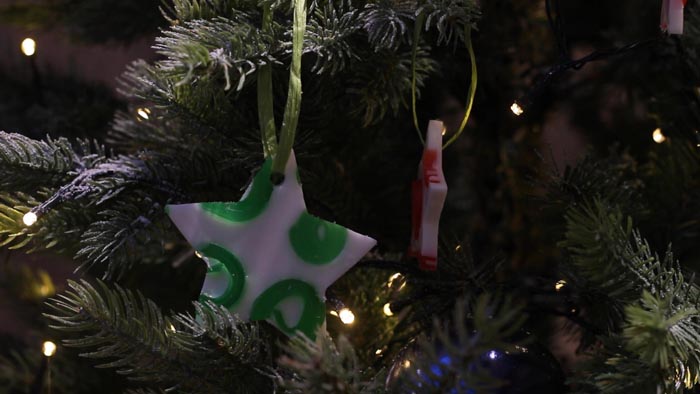
There you have it!
Your very own soap ornaments that you can decorate with or give away as cute little gifts!
Now it's time to try it yourself! Change up the project and make it your own.
We'd love to see pictures of your creations! If you post your results on social media, make sure you tag us and use #lonestarcommunity to see your creations on our Lone Star Community Page!