How to Decorate Holiday Candles

We wanted to make some cute Holiday candles that you could either use to decorate your home or give away as the perfect little gifts.
This project was fairly simple and something even your kids could help you with. We had so much fun decorating the jars and choosing our favorite Holiday scents for the candles!
Be sure to check out this Redfin Article which we're featured in, Cozy Up to These 2024 Holiday Scents, to bring joy into your home during this season!
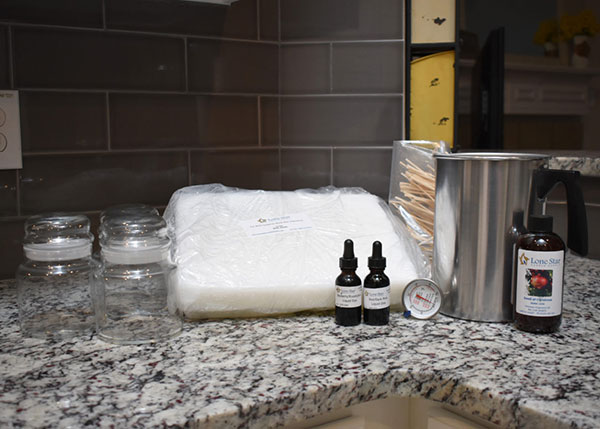
Here's What You'll Need:
Libbey Storage Jar 22oz
Paraffin or Soy Container Wax (We used IGI 4630)
Candle Wicks (We used LX-30 Wicks)
Candle Dye
Whitening Powder
UV Stabilizer
Fragrance Oil
Wick Stickers
Pouring Pot
Thermometer
Wick Bars
Metal Spoon
Parchment or Wax Paper
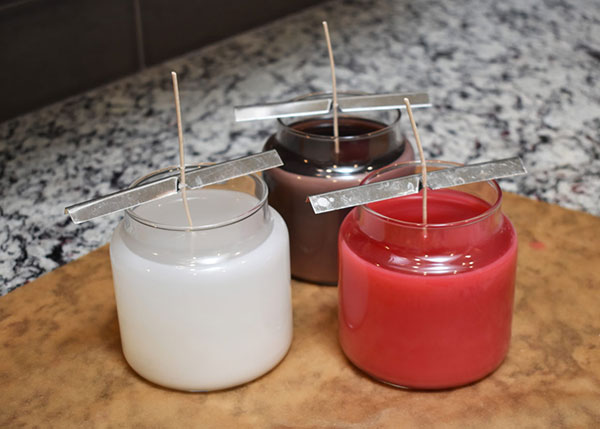
Step 1
First, to make the candles, follow the steps in the How to Make Container Candles tutorial found in the Candle Making University. We find it fairly easy to make candles in the kitchen! Try to stay organized and make sure you lay out plenty of parchment paper or wax paper to make cleanup easy.
Now that you have made your candles, you'll need to let them cool overnight. The IGI 4630 wax is meant to be a single-pour paraffin but, this time of year especially, you can get a little bit of sinking around the wick. Make sure you save yourself a little bit of wax to do a second pour if needed.
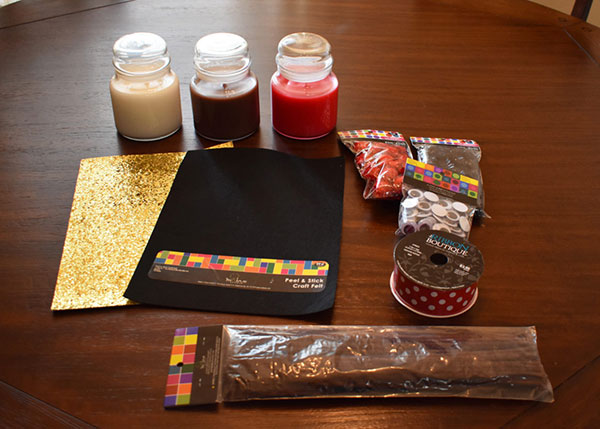
Here's What You'll Need to Decorate Your Candles
Gold Glitter Felt Sheet
Black Felt Sheet
Red Pom Poms
Black Pom Poms
1.5" Grosgrain Ribbon
0.5" Googly Eyes
Hot Glue Gun
Scissors and/or Exact-o Knife
Pen or Pencil
Small Sheet of Cardboard
First, let's decorate the Santa candle.
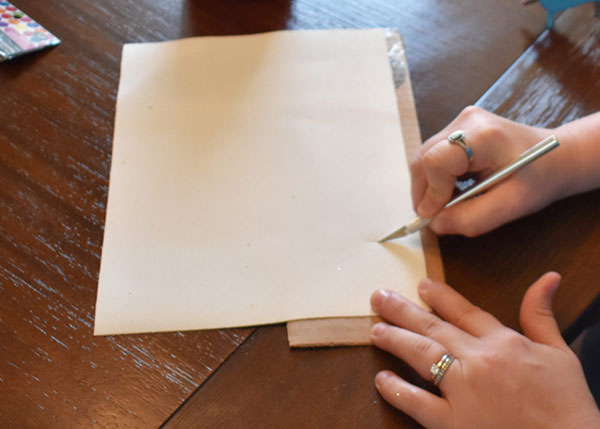
Step 1
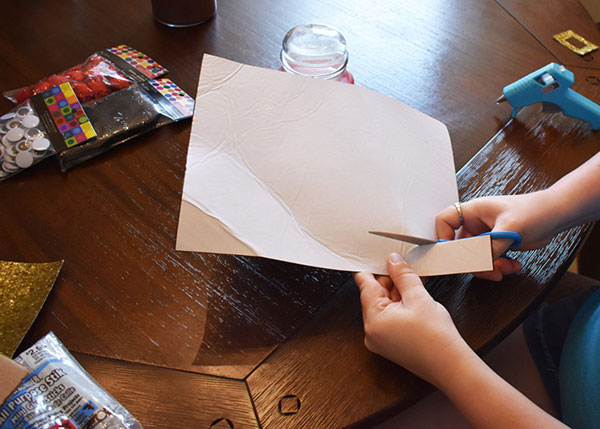
First, take the piece of gold felt, turn it over the shiny side down, and put a piece of scrap cardboard behind it. Then, draw out the belt buckle for the Santa candle. We drew ours about 2.5" wide and 2" tall then cut out the centerpiece using an Exact-O knife. Once we had the center cut out, we used the scissors to cut out the rest of the buckle.
Step 2
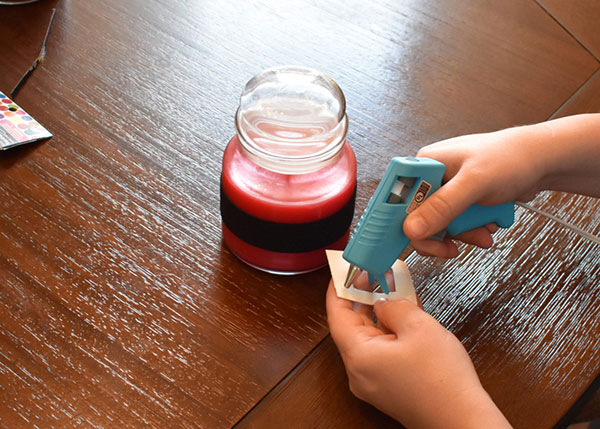
Step 2 Next, take the black piece of felt and a ruler and measure out a strip about 1.5" wide. This will be for the belt that goes underneath the gold belt buckle. We used a sticky-sided felt here but regular black felt will work just fine, you will just need to adhere it to the jar using hot glue.
Step 3
Then, take the strip of black felt, and wrap it around the candle. We had to have one smaller piece of felt in the back to make it fit all the way around but it looks seamless! Once the black felt has been adhered to the jar, take your gold belt buckle and use the hot glue to adhere it to the belt and, voila! You have a cute little Santa candle!
Next, decorate the Rudolph candle.
Step 1
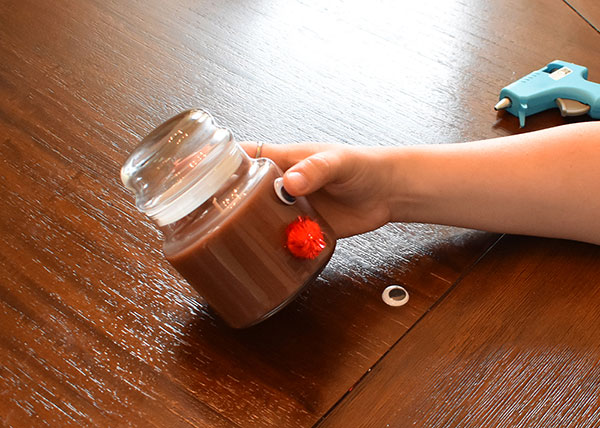
First, take one of the red pom poms and carefully glue it to the jar using the hot glue. Next, take two of the googly eyes and adhere them to the jar as well.
Step 2
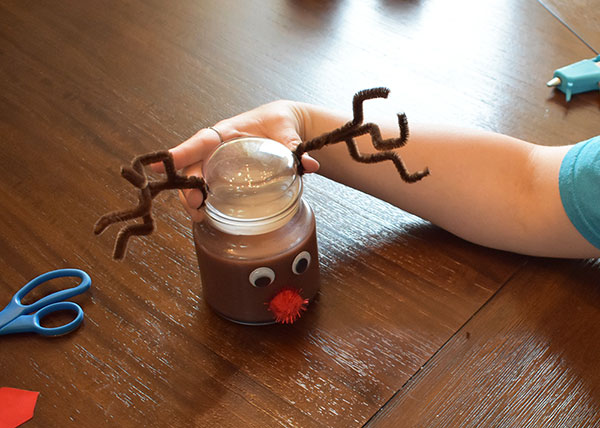
For the antlers, take a couple of the brown pipe cleaners and twist them together to get as many antlers as you'd like. Bend and flex the antlers a few times until they start to look like real antlers then, take the hot glue and adhere them to the lid of jar.
Then, decorate the snowman candle.
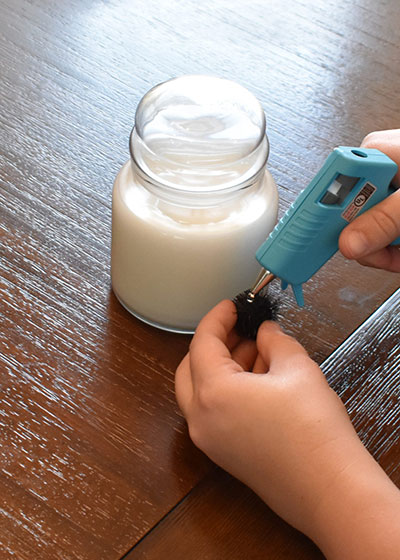
Step 1
First, take the black pom poms and use hot glue to adhere them to the jar where his buttons should be.
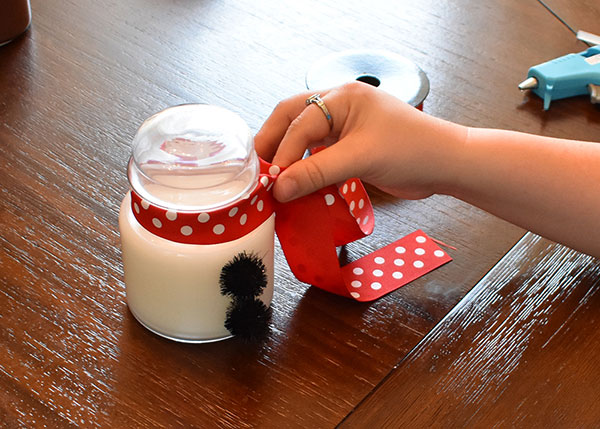
Step 2
Next, take the ribbon and cut off about 18" of length to give yourself plenty of room to wrap it around the neck of the jar. Then, fold the center of the ribbon in half long ways and use the hot glue to glue it together. Now, add a line of hot glue along the folded portion of the ribbon and wrap it around the neck of the jar. Finally, take a pair of scissors and trim off the excess ribbon and you should have a perfect little "scarf!"
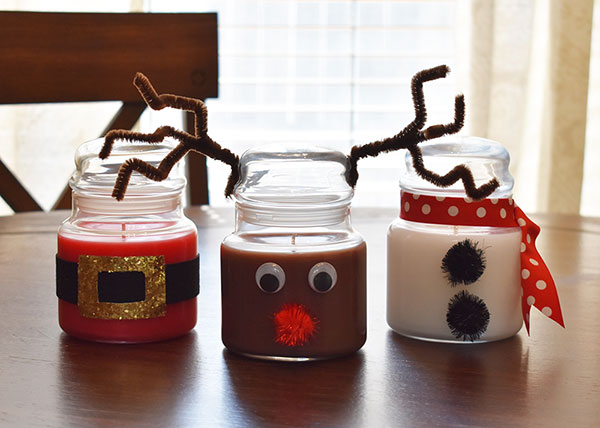
That's it!
Add Text HereAnd that's it! Now you have three little Holiday candles that you can either use as decorations in your home or the perfect little gifts for teachers, family, friends, or whoever! Add your own little twist to these candles by using different color materials and choose your favorite fragrances! Browse our selection of candle making supplies to get started now!
Tag us if you share your creations on your social media accounts! You can use the hashtag #lscscommunity and see your beautiful creations on our Lone Star Community Page.